TechPD
The goal of this page is to provide the rest of the Prosperity staff, our district, and the world with online 24/7 professional development. We want to share some of our learning with you.
Foldables
One simple thing that everyone can do with a computer is make foldables. We have made foldables for reading and math projects. You can make an eight page foldable booklet for any subject by following these steps. First, go to page set up and divide the page into four columns. Then place a black line at 4.25 inches. Since we use Macs we do this in pages by choosing the shape tool and selecting the line. Next, place a straight line on each column. I placed mine at the 3 7/8 mark, 5 7/8 mark, and the 8 6/8 mark. Now, now choose a textbox and drag it to one of the boxes you have created. Type any text you wish in the box. Add any pictures you wish by dragging and dropping them on to the page. When working in the lower boxes on the page you will want to flip the textboxes and pictures by going to arrange and choosing flip horizonally and vertically. If you want to free rotate the textbox or picture, select the item, hold down the command key, place the mouse in the corner of the item until you see the curved shaped line. Now you can rotate the item any way you want. Enjoy making your own foldable or mini books in this way.
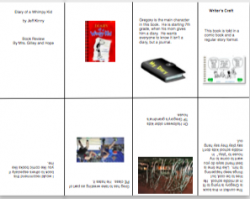
Square Foldable

This next foldable is very similar to the first one, but is in a square shape and requires much more math to create. Make sure you make the connection to math while creating it. Begin by opening a blank document in Pages; then tell students that a regular page is 8 1/2 in. wide by 11 1/2 in. long. To make a square foldable ask them where they would need to place a black line on the page to make a square. (8 1/2 in.) Next, choose the shape tool again and the line and make a black line on the 8 1/2 in. mark and from each corner to create an x across the page. Now you should have four triangles. Ask students what type of triangles they have created. They can divide the triangles in half by placing more black lines, if you would like or making 90 degree angles. You can leave one triangle blank. Cut down one side of the foldable; then glue the blank side to the back to create a pyramid foldable. After printing, be sure to cut the rectangle off of the end of the page before doing any folding.
Building Your Own Webpage
Have you ever wanted to build your own webpage. Many teachers have classroom webpages. They use these as tools to communicate with their parents and students. Some post upcoming assignments, due dates, and links on their webpage.
There are many sites on the internet now that you can use to build a free webpage. Before you begin, do some planning. Ask yourself what do I want to include in my site, how will I have students use the site, and what is the purpose of the site. If you want just a place to inform students and parents of assignments and due dates; then a wiki might meet your needs. If you want a place to share more information, you would be better offer with a website similar to this one.
There are many sites on the web that offer a place to build a free webpage. I choose http:www.weebly.com because it will allow me to upload my own pictures and video into the site. Another site this is somewhat more flashy is http://www.wix.com/
I also found it the easiest to use. All you have to do is drag and drop to begin.
Digital Story Telling
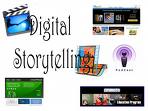
We all know the power of a story. A good story has voice that causes us to have emotion. Some make us laugh. Some make us cry. The difference between a digital story and a story written on paper is the pictures. Pictures enhance the emotion of the story. The best tool we have available in our district to create a digital story is imovie. If you can use keynote and garageband, you can use imovie. It is very similar with the drag and drop feature.
Begin your digital story telling unit by creating your own digital story as an example. Then give students a prompt and have them write a story. One important management tips is never allow students to begin using the technology until the story is written. Next, collect the pictures that students will put in their movies. They can scan or get them from the Internet. Do give students a limit to how many pictures you will allow them to use. Also, give them a time limit on collecting pictures. One class period should be an adequate amount of time. Once the pictures are collected drag them from your iphoto or desktop right into the clip tray in imovie. Students then pull the pictures into the story clip in the order that they want their pictures to be.
Next, have students practice reading their stories before they do any recording. Finally, students will record their stories in imove. They can cut any mistakes by going to edit and split at playhead. Then highlight the section they want to cut and push delete.
Here is an excellent example of a digital story. http://www.digitales.us/story_details.php?story_id=80
